- User Guide
- Get Started
- How to Use Advanced File Recovery?
- Supported File Formats
- Frequently Asked Questions (FAQs)
- About Advanced File Recovery
Home / Help / Getting Started / User Interface / User Interface - Advanced File Recovery
User Interface - Advanced File Recovery
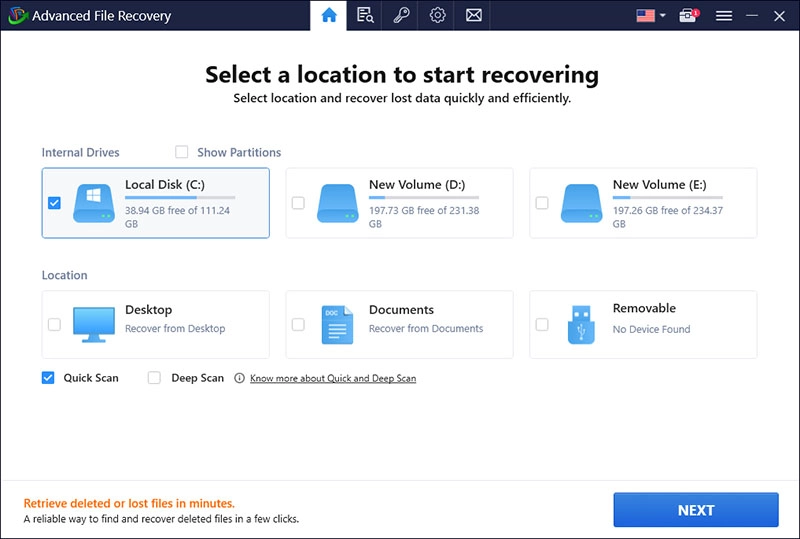
The home screen of Advanced File Recovery software is straightforward and interactive. When you launch the recovery application, you will see a screen divided into three sections.
- Hard Drive - Shows all the disk partitions. Click the check box next to the drive letter you wish to scan for lost documents, text files, archives, pictures, audio, or video files.
- Location - Select the area you wish to scan for lost documents, text files, images, archives, audio, or video files.

Two scanning modes:
Below the location section, you will find two scanning options Quick Scan and Deep Scan. Using either of these options, you can perform scanning and recover deleted or lost documents, photos, audio, videos, and other file types.
- Quick Scan- as the name suggests, Quick Scan is faster than Deep Scan, & the scan type looks for permanently deleted and recoverable documents, text files, archives, photos, audio, & video files.
- Deep Scan - this scan type is thorough and performs a systematic sector-wise scanning, helping recover the maximum number of deleted documents, archives, text files, pictures, audio, & video files.
Remember: Deep Scan is time-consuming, so you must be patient while the scan is completed.